First off, do not be affraid to do this conversion. Everyone who says it is difficult has probably never attempted it. Everything bolts on, and you can even keep the center console from the auto. This thread will only cover my manual conversion. I am choosing to keep it separate from my generation 3 3sgte swap, because even though i did them both at the same time, most people who do a gen 3 swap do not do a manual conversion.
parts and tools:
vice grips
12mm flare nut wrench
14, 12 & 10 mm socket and ratchet
hammer and flat head screwdriver
all other tools to remove transmission
new manual transmission
shifter cables
master and slave cylindars
clutch hard lines and soft line
clutch hard line connector
brake and transmission fluid
entire shifter assembly
grease
brake pedal from manual transmission mr2
clutch pedal and assembly
start off by removing the center console:

there are some electrical plugs to remove, and you must remove the bolts holding the entire shifting assembly onto the car. You can just remove everything and disconnect the cable. I didn’t know this at first, and since i didn’t intend on keeping any of the pieces I just broke everything and then figured it out 😛 you may need to keep the small black computer attached to the shift assembly. I have heard that if you just do a straight manual conversion that you need it to start the car, and the automatic shifter needs to be in park when you remove it. otherwise the car may not start. I believe you also need to plug that computer back in when you’re done. I did not need that computer, probably because i put in the gen 3 with the new harness designed for a manual. after that disconnect the cable from the transmission.
remove the transmission from the car. ( I took the whole engine out ).
remove the gas tank. ( this I needed to do anyway, and would not have otherwise known where to route the cables).

Install your new master cylindar in the frunk. it bolts directly to the clutch pedal you must also install now. there is a dust cover over the hole. push it out from the passenger compartment. place a light on the floor of the passenger compartment facing forward. this allows you to see where to mount the master cylindar. you need to install both pieces at the same time, and it is easiest with two people, although this is the hardest part of the swap IMO. you may notice there is a sensor on the pedal assembly. You will not have anything to plug there so don’t worry about it. generally you would need to depress the clutch pedal to start the car, but I do not need to. I thus assume that the ecu defaults to allowing you to start the car if the sensor bugs out. Its a good thing toyota did that  . you also need to install a new brake pedal because the manual car uses a smaller pedal so there is room for the clutch pedal.


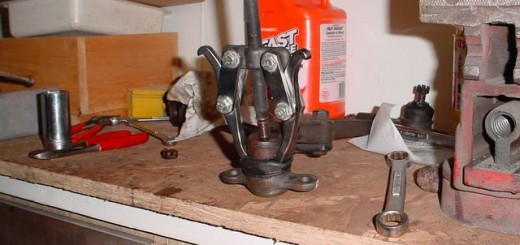
now, you may want to rebuild your shifter assembly.

It just takes some time and a little work you may need to get physical to get the shifter out of the bushing. I just hit it against a piece of steel until it came out (probably not the best idea, but it worked.) remove all bolts and retainers and washers, and just get the whole thing into as many peices as you can (remembering where everything goes of course ) now take a look at everything, isn’t that dirty!

clean everything well, and put fresh grease on the bushings. I took this time to install a TRD short shifter


Put it in the car!!! it bolts right in.

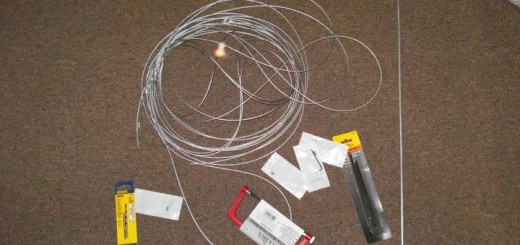
route your shifter cables through the rear firewall where your old one went. you can either customise that rubber seal to fit two cables, or get a new one.

see how the center console fits:

if you are just doing the manual conversion, plug that little black computer back in before you install the center console.
route your clutch lines. there is a short one from the master cylindar, and a longer one that attaches via connector to the short one. Use a flare nut wrench to connect them. size 12mm I believe for all connectors on the clutch lines. that is the only connector you need to buy. I got all my lines from Toyota. the long line follows the brake line perfectly, they even left dual hose brackets for you! Just unbolt them one by one and put them back on with both the clutch and brake lines in them. easy!

make sure your bleeder valve works for your slave cylindar BEFORE you put your transmission back in. its in a really bad place to replace if you break it. now put your transmission back in the car. fill it with fluid. hook up the flexible hose to the hard line at the front of the engine bay with a flare nut wrench (12mm). now you just need to bleed the system and you should be good to take it for a test drive. it took me an entire hour of bleeding for the pedal to get pressure, so don’t give up! Also, make sure you don’t let the master cylindar run out of fluid while bleeding. otherwise you get to start all over again!
Enjoy!!!
This documentation in no way replaces the Toyota MR2 Repair Manuals. The purpose of this content is only to provide supplementary information to fellow MR2 enthusiasts. Midship Runabout and its contributing authors will not be held responsible for any injury or damages that may occur as the result of practicing any of the methods or procedures described within this website. Article and photo submissions are property of the contributing author.