Engines: Compatiblity / Grocery List
1997+: 1MZ-FE
Best choice for swap.
1992-1996: 1MZ-FE
Compatible, but not recommended.
Early 90’s 3vz is proven to work also*
Source Cars:
Avalon
Solara
Lexus ES300
Camry
What to Buy / Get with Engine:
“remember to get a 97+ manual motor w/ ecu or you will have drama”
— Engine Long Block -dugh
— Transmission (97+ recommended, not required for Turbo owners)
— AC Compressor
–Alternator*
— AC Lines to compressor (cut)
— Alternator
— Engine Mounts
— Intake Tube w/ top of Airbox (ensure sensors are there)
— ECU
— ECU Harness (uncut)
— Dash Plugs that go to ECU
— Tachometer from 97+ 1MZ-FE Car (only if you started with a NA tach
— Fuel Rails (94-95 1MZ-FE with return system)*optional
— 94+ V6 Intermediate Shaft (with 6 bolts on CV joint) *must be modified
Credits -derek2000GT
Weight / Space Issues: Quick Read
There aren’t really any weight issues when using a 1MZ-FE engine, in fact the stock engine is about 30lbs. lighter than a 3S-GTE. So don’t worry about upsetting your balance.
Throwing a Supercharger/Turbo system on will add a few more pounds though, but it is definitely not an overbearing monster. (Credits: derek2000GT)
There is also the issue of space, which is another thing not to be worried about. The 1MZ-FE fits easily into the engine bay, and actually increases the space available on the passenger side for whatever performance part you’d like to stuff there. (Credits: Turbo Magazine, January 2003)
Engine Mounts: General
Someone should definitely post some blueprints here.
“In total there are 5 possible mounts–3 for the tranny and 2 for the engine (anterior and posterior). The passenger side 3S-GTE/5S-FE engine mount must be abandoned if you anticipate putting a supercharger on (and who doesn’t).” -chall
I have built two motor mounts that use the pass side mount. Complete fabrication of all mounts is not necessary but recommended if you want a mount to absorb any engine noise.
Fuel Return: Adapting Properly
The MR2 comes stock with a fuel return system, which must be addressed by either installing the pump from the source car into the gas tank, tapping the fuel rail to accomodate the return line, or obtaining a fuel rail from a 3VZ-FE which is a direct fit.
3VZ-FE Option
“This is old news to Camry guys but a 3VZ-FE return fuel rail system will bolt right on to 1MZ-FE. this set up gives you the regulator, lines etc.. just bolt on. you can probably get one from junk /core motor at a yard for cheap. …if you have a turbo and still have fuel line it will bolt right up. otherwise (non-Turbo owners) you will have to have new hose crimped on. The rails from a 94-96 1MZ-FE will have full return style system and your MR2 return line plugs right in.
…if you are a little unsure about tapping stock 1MZ-FE rail i would highly reccommend the 3VZ-FE rail install…save time and will be 100% OEM.” -derek2000GT
Tapping the Rail Option
“The fuel rails are fine if you do not want a return system, but you will have to have a fuel pump with a FPR or an in tank FPR like a Camry, as the 3S-GTE has an FPR on the fuel rail in the return system. I have an adjustable FPR (AEM) on one of my fuel rails for when I go to larger injectors. I bored out the end of the stock rails, threaded them on the outside, and connected them with NPT fittings to the MR2 system.” -chall
I have used the earlier fuel rails and also welded -6 lines with an adjustable regulator for my two cars.
Tachometer: Get it Working
“You will need to buy a tach from a 97+ 1MZ-FE equipped car. (AVALON, CAMRY, SOLARA, SEINNA, ES300) The tachs are the same on all models and will bolt right into cluster w/ no mods at all.” -derek2000GT
“It is almost scary how plug and play most Toyota parts are, at least in this swap. The tach looks virtually identical to the stock MR2 tach (the mechanical part that attaches to the back of the face). …we found that the tach slips right in and, thud, no tach adaptor needed.” -chall
“You will need the tach overlay for an NA MKII MR2. It has a 180 deg sweep with a 6300 redline. As oppesed to a 180 deg sweep 7000 redline/ 7250 revlimit Turbo gauge. Without it your tach will be completely inaccurate. It fits and has the same font/ look as other MR2 gauges.” -Luke
I have also used a 1k ohm resistor and diode hooked to two of the negative sides of the coils and used the stock tach. If I’ve not updated the link, I will shortly.
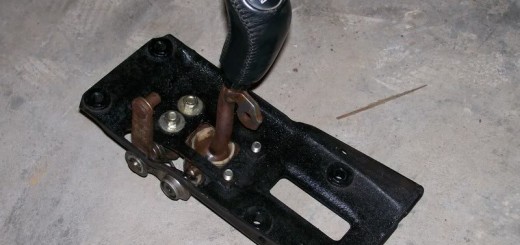
“You will have to drill hole on front side for rod for MR2 linkage
and buy a cover (has 4 bolts on other side of linkage)” -derek2000GT
BUT:
“The block-transmission bolt patterns on the 5S-FE, 3S-GTE, and the 1MZ-FE are the same. Any transmission that works with one engine should work with any of them.” -chall
(This includes manual transmissions)
Some Info About VVT-I
VVT-I Engines availble only in automatic, until 2003. (Manual Tranny bolts on though)
Wiring / ECU issues will need to be addressed, due to automatic transmission errors
TRD is developing piggyback VVT-I ECU, available 2003
A piggyback VVT-I controller is neccessary to properly run. (Wolf EMS: http://www.wolfems.com.au) -derek2000GT
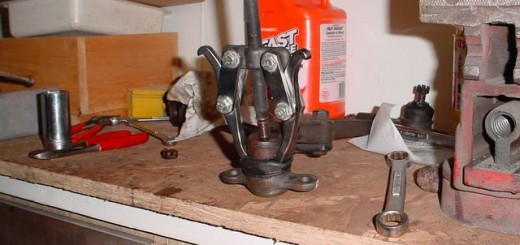
Driveshafts: Adaption and Conversion
“The V6 intermediate shaft (A) bolt right to MR2 CV joint on passenger side. ….Use a V6 intermediate shaft that has 6 bolts on CV joint which is same a MR2 so you can bolt to outer MR2 axle” -derek2000GT
The 93+ Turbo drivers side driveshafts should fit properly, without any adjustments.
*EDIT*
Please see the FAQ on this, you will have to machine a new C-clip for the driveshaft to work. No one has successfully found a shaft that will correctly fit the V6 mount and MR2 tranny. Someone please update me once you find the correct part. (I want specific model and year info along with a quick photo if possible)
Radiator hoses I used
(1)71704 Hose to connect to the factory pipe in the engine bay, left side.
(2) 80413 Heater hoses 90 degree bend on the end.
These hoses work real well. I had to cut them to fit,but have the correct bends and are reasonably priced.
The right side hose will be a little harder, but consists of cutting the pipe under the car, rotating the bend roughly 90 degrees, and routing the hose up the firewall just on the outside of the Belt. I will post pics of this when I’m finished later this week.
Exhaust manifolds will need to be modified, see SCC’s how to install a V6 for the most simple solution.
**Pete94t**
IF you don’t want cruise, you can re-route the main line under the car to the driver’s side and it’s the perfect length to the throttle body, with no junction boxes the pedal feel is better.
**Edit**
This works well, I have this done on my Yellow 91.
**Chall**
Technically speaking, the solara/camry transmission is the E351, not the E153, and I think this denotes the difference in drive gear ratios and final drive. Also, the synchros are much better than in the ’91-’93 turbo transmission. If you have the turbo transmission it will work, but you run out of first gear more quickly. Also, you can make the diode change that Brad discovered but you are going to have to use an electronic speedo with the solara tranny and so you might as well pick up a guage cluster and use both the speedo and the tach for your swap. this lets you get rid of the speedo cable, which removes one of the major hassles of taking the MR2 guage cluster out. Of course, you will need the linkage from an MR2 transmission and also need to drill a hole to use this linkage on the solara tranny–easy to do.
The half shafts are turbo on the driver’s side, and solara on the passenger side only because there is a 1/8″ or 3mm*** difference in the carrier bearing position. Turbo shafts will fit nicely in the solara transmission. I had the bearing ring machined so that I could use the turbo passenger side shaft. It is impossible to combine the two shafts to make one as the type of CV joint on the solara shaft is enclosed and the diameter of the shaft in the CV joint is smaller.
Personally, I think that the passenger side mount for the engine should be abandoned altogether because you cannont add the supercharger and you will definitely want to add the supercharger. Front and rear engine mounts are not hard to fabricate and I have autocad diagrams of one design, but not the only design by any means.
–I have lowered my compression ratio by using 8.5:1 JE pistons and Eagle 22R rods but the rods take machining to thin them for the 1MZ (by .135 per side) and they are about .012 different in their C-C. But you can get them on Ebay and they are an initial $350 investment plus whatever it costs in your area to machine them. When and if you order pistons, let them know so that you can get pistons with the piston pin positon correct.
–I would use the 1MZ alternator. What Luke and I did was to attach the wires to the alternator using simple electrical connections and pouring epoxy around the connections so that now we have an alternator that has the long wires attached.
Claire
*** Edit by Brad, Original was 1cm
**Chall**
If I am understanding correctly, you are asking whether the turbo transmission without LSD uses the same axles as the LSD E153 and the Solara 351. I put a Toyota MR2 LSD into a Camry 5 speed (year 2000) and it uses the MR2 axles that I had machined to move the carrier bearing retainer groove. Of course, the differential defines which axles are used in these transaxles, so using an MR2 LSD (which fits exactly) guarantees that the turbo axles will work.
I don’t have succesful experience with mixing axles. I tried it but perhaps I used a too new axle to try to change the intermediate shaft, as the newer axles from the Solara/Camry are entirely different from the ’90/’95 US MR2 axles. It cost me $50 to have the turbo axle machined, and I thing that was kind of a rip-off.
Here is what I think about the swap:
–Not much needs to be done to the 1MZ-FE itself unless you are going to more than 4 PSI of boost. Derek has found that the return fuel system from other engines works well, or you can simply drill and tap both ends of the fuel rail and make a U-shape out of it to make a return system.
–You can use the stock Solara/Camry ECU, auto or manual, with the wiring diagrams that Luke worked out.
–I would abandon the passenger mount and make front and rear engine mounts for the 1MZ-FE so that you can supercharge later.
–I would abandon the turbo/NA water system after the main pipes beneath the gas tank, and connect more directly with a couple of pipe bends.
–I would get rid of the brake booster line across the firewall.
–I would move the oil filter with a remote kit.
–I would have the passenger axle machined.
–If you want A/C, have the MR2 lines tig welded to the 1MZ-FE lines. There may be much better solutions; I don’t know.
–You can direct connect the cruise control to the throttle and the throttle body very simply, but you have to move the throttle cable to the drivers’ side.
–I prefer the ratios of the Camry/Solara transmission E351 over those of the MR2 E153.
Overall, this is a simple process and should not take long if you prepare for it.
**SBCelicaGT**
1MZFE engine debuted in 1992. in 1997 it was updated with among other small changes, a returnless fuel system. later on it had VVTi as an option. all 3 generations of engine are aluminum. the 92-96 return fuel rails will bolt to the gen2 engines. or you can make your own returnless fuel system and it doesnt require any drilling or tapping.
axles: all the solara/avalon/sienna/ etc. axles I have seen arent rebuildable. I.E. they dont have the bolts in the middle to attach the inner and outer sections.
the mr2 turbo inner axles work just fine with the Solara tranny. the only mod you need to do is to slot the carrier bearing mount ever so slightly as it will be off by a few millimeters. For the celicas, you can then bolt outer alltrac axles to the inner turbo axles. for you mr2 guys, you can just use the whole turbo axles.
ecu: auto tranny ecu will work but you will have ECU codes till you find a way to fool the ECU into thinking there is an A/T in your engine bay by way of wiring resistors to the ends of the solonoid plug. Easy fix.
16 300-8343 7/16 12pt Nut
16 200-8519 .750 od washer
16 AM4.125-1lb M10x4.125 1.25/1.50 Broach (Stud)
These studs fit the motor with no modifications. Torque them to 65lbs with the ARP lube.
Modify either a set of 22R rod bearings so that they fit the new rod width, or modify the bearing locator slots in the rods.
You’ll have to radius the big end to get it to fit into the cylinder bore. *OR* I think boring the motor .040 would do the trick.
Also, be advised that you are adding close to 100 grams of weight to each cylinder. Adding metal to the counter weights on the crank will be necessary.
Good news, the Eagle rods will be tons of overkill on this engine. I suspect the block will fail before the new rods.
Eagle rods for the 22R will work. You will need to do the following:
This documentation in no way replaces the Toyota MR2 Repair Manuals. The purpose of this content is only to provide supplementary information to fellow MR2 enthusiasts. Midship Runabout and its contributing authors will not be held responsible for any injury or damages that may occur as the result of practicing any of the methods or procedures described within this website. Article and photo submissions are property of the contributing author.